文章目录
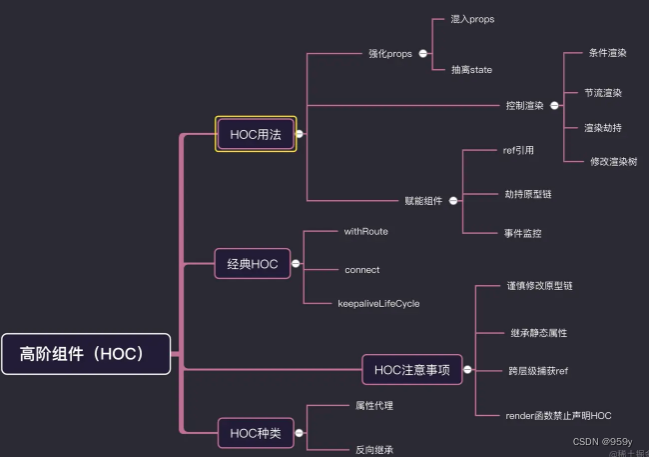
- 1.Hoc介绍
- 2.几种包装强化组件的方式
- 2.1 mixin模式
- 2.2 extends继承模式
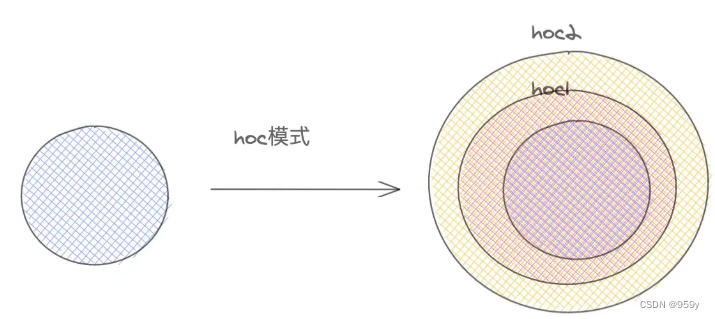
- 2.3 HOC模式
- 2.4 自定义hooks模式
- 3.高阶组件产生初衷
- 4.高阶组件使用和编写结构
- 4.1 装饰器模式和函数包裹模式
- 4.2 嵌套HOC
- 5.两种不同的高阶组件
- 5.1 正向的属性代理
- 5.2 反向的继承
- 6.如何编写高阶组件
- 6.1 强化props
- 6.1.1. 混入props
- 6.1.2 抽离state控制更新
- 6.2 控制渲染
- 6.2.1 条件渲染
- 6.2.1.1 动态渲染
- 6.2.1.2 分片渲染
- 6.2.1.3 异步组件
- 6.2.1.4 渲染劫持
- 6.2.1.5 修改渲染树
- 6.2.2 节流渲染
- 6.2.2.1 节流原理
- 6.2.2.2 定制化渲染流
- 6.3 赋能组件
- 6.3.1 劫持原型链
- 6.3.1.1 属性代理实现
- 6.3.1.2 反向继承实现
- 6.3.2 事件监控
- 6.3.2.1 组件内的事件监听
- 6.3.3 ref助力操控组件实例
- 6.3.3.1 属性代理-添加额外生命周期
- 6.4 总结
- 7.高阶组件源码级实践
- 7.1 强化props
- 7.2 控制渲染
- 7.3 赋能组件
- 8.高阶组件的注意事项
- 8.1 谨慎修改原型链
- 8.2 继承静态属性
- 8.2.1 手动继承
- 8.2.2 引入第三方库
- 8.3 跨层级捕获ref
- 8.4 render中不要声明HOC
1.Hoc介绍
高阶作用用于强化组件,复用逻辑,提升渲染性能等作用。
高阶组件(HOC)是 React 中用于复用组件逻辑的一种高级技巧。HOC 自身不是 React API 的一部分,它是一种基于 React 的组合特性而形成的设计模式。
2.几种包装强化组件的方式
2.1 mixin模式
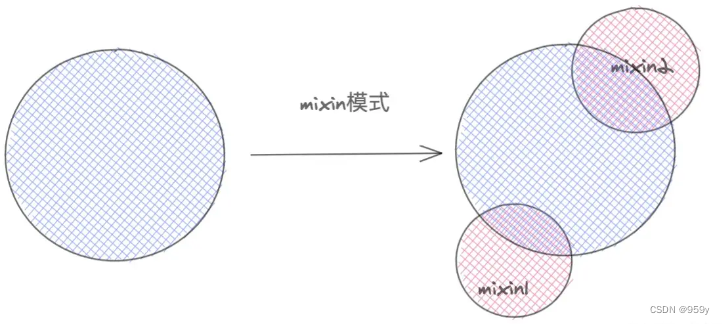
在react初期提供一种组合方法。通过React.createClass,加入mixins属性,具体用法和vue 中mixins相似。
const customMixin = {
  componentDidMount(){
    console.log( '------componentDidMount------' )
  },
  say(){
    console.log(this.state.name)
  }
}

const APP = React.createClass({
  mixins: [ customMixin ],
  getInitialState(){
    return {
      name:'alien'
    }
  },
  render(){
    const { name  } = this.state
    return <div> hello ,world , my name is { name } </div>
  }
})
这种mixins只能存在createClass中,后来React.createClass连同mixins这种模式被废弃了。mixins会带来一些负面的影响。
- mixin引入了隐式依赖关系。
- 不同mixins之间可能会有先后顺序甚至代码冲突覆盖的问题
- mixin代码会导致滚雪球式的复杂性
我们可以通过原型链继承来实现mixins。
const customMixin = {  /* 自定义 mixins */
  componentDidMount(){
    console.log( '------componentDidMount------' )
  },
  say(){
    console.log(this.state.name)
  }
}

function componentClassMixins(Component,mixin){ /* 继承 */
  for(let key in mixin){
    Component.prototype[key] = mixin[key]
  }
}

class Index extends React.Component{
  constructor(){
    super()
    this.state={  name:'alien' }
  }
  render(){
    return <div> hello,world
      <button onClick={ this.say.bind(this) } > to say </button>
    </div>
  }
}
componentClassMixins(Index,customMixin)

作者:我不是外星人
链接:https://juejin.cn/post/6940422320427106335
来源:稀土掘金
著作权归作者所有。商业转载请联系作者获得授权,非商业转载请注明出处。const customMixin = {  /* 自定义 mixins */
  componentDidMount(){
    console.log( '------componentDidMount------' )
  },
  say(){
    console.log(this.state.name)
  }
}

function componentClassMixins(Component,mixin){ /* 继承 */
  for(let key in mixin){
    Component.prototype[key] = mixin[key]
  }
}

class Index extends React.Component{
  constructor(){
    super()
    this.state={  name:'alien' }
  }
  render(){
    return <div> hello,world
      <button onClick={ this.say.bind(this) } > to say </button>
    </div>
  }
}
componentClassMixins(Index,customMixin)
2.2 extends继承模式
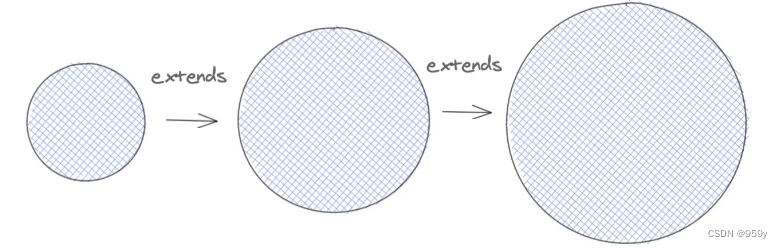
在class组件盛行之后,我们可以通过继承的方式进一步的强化我们的组件。这种模式的好处在于,可以封装基础功能组件,然后根据需要去extends我们的基础组件,按需强化组件,但是值得注意的是,必须要对基础组件有足够的掌握,否则会造成一些列意想不到的情况发生。
class Base extends React.Component{
  constructor(){
    super()
    this.state={
      name:'alien'
    }
  }
  say(){
    console.log('base components')
  }
  render(){
    return <div> hello,world <button onClick={ this.say.bind(this) } >点击</button>  </div>
  }
}
class Index extends Base{
  componentDidMount(){
    console.log( this.state.name )
  }
  say(){ /* 会覆盖基类中的 say  */
    console.log('extends components')
  }
}
export default Index
2.3 HOC模式
function HOC(Component) {
  return class wrapComponent extends React.Component{
     constructor(){
       super()
       this.state={
         name:'alien'
       }
     }
     render=()=><Component { ...this.props } { ...this.state } />
  }
}

@HOC
class Index extends React.Component{
  say(){
    const { name } = this.props
    console.log(name)
  }
  render(){
    return <div> hello,world <button onClick={ this.say.bind(this) } >点击</button>  </div>
  }
}
2.4 自定义hooks模式

hooks解决无状态组件没有state和逻辑难以复用问题。hooks可以将一段逻辑封装起来,做到开箱即用。
3.高阶组件产生初衷
组件是把prop渲染成UI,而高阶组件是将组件转换成另外一个组件,我们更应该注意的是,经过包装后的组件,获得了那些强化,节省多少逻辑,或是解决了原有组件的那些缺陷,这就是高阶组件的意义。
- 复用逻辑:高阶组件更像是一个加工react组件的工厂,批量对原有组件进行加工,包装处理。我们可以根据业务需求定制化专属的HOC,这样可以解决复用逻辑。
- 强化props:这个是HOC最常用的用法之一,高阶组件返回的组件,可以劫持上一层传过来的props,然后混入新的props,来增强组件的功能。代表作react-router中的withRouter。
- 赋能组件:HOC有一项独特的特性,就是可以给被HOC包裹的业务组件,提供一些拓展功能,比如说额外的生命周期,额外的事件,但是这种HOC,可能需要和业务组件紧密结合。典型案例react-keepalive-router中的 keepaliveLifeCycle就是通过HOC方式,给业务组件增加了额外的生命周期。
- 控制渲染:劫持渲染是hoc一个特性,在wrapComponent包装组件中,可以对原来的组件,进行条件渲染,节流渲染,懒加载等功能,后面会详细讲解,典型代表做react-redux中connect和 dva中 dynamic 组件懒加载。
4.高阶组件使用和编写结构
4.1 装饰器模式和函数包裹模式
@withStyles(styles)
@withRouter
@keepaliveLifeCycle
class Index extends React.Componen{
    /* ... */
}
越靠近Index组件的,就是越内层的HOC,离组件Index也就越近。
function Index(){
    /* .... */
}
export default withStyles(styles)(withRouter( keepaliveLifeCycle(Index) ))
4.2 嵌套HOC
对于不需要传递参数的HOC,我们编写模型我们只需要嵌套一层就可以,比如withRouter。
function withRouter(){
    return class wrapComponent extends React.Component{
        /* 编写逻辑 */
    }
}
对于需要参数的HOC,我们需要一层代理。
function connect (mapStateToProps){
    /* 接受第一个参数 */
    return function connectAdvance(wrapCompoent){
        /* 接受组件 */
        return class WrapComponent extends React.Component{  }
    }
}
对于代理函数,可能有一层,可能有很多层。
5.两种不同的高阶组件
正向的属性代理和反向的组件继承
5.1 正向的属性代理
用组件包裹一层代理组件, 在代理组件上,我们可以做一些,对源组件的代理操作。在fiber tree 上,先mounted代理组件,然后才是我们的业务组件。我们可以理解为父子组件关系,父组件对子组件进行一系列强化操作。
function HOC(WrapComponent){
    return class Advance extends React.Component{
       state={
           name:'alien'
       }
       render(){
           return <WrapComponent  { ...this.props } { ...this.state }  />
       }
    }
}
优点:
- ① 正常属性代理可以和业务组件低耦合,零耦合,对于条件渲染和props属性增强,只负责控制子组件渲染和传递额外的props就可以,所以无须知道,业务组件做了些什么。所以正向属性代理,更适合做一些开源项目的hoc,目前开源的HOC基本都是通过这个模式实现的。
- ② 同样适用于class声明组件,和function声明的组件。
- ③ 可以完全隔离业务组件的渲染,相比反向继承,属性代理这种模式。可以完全控制业务组件渲染与否,可以避免反向继承带来一些副作用,比如生命周期的执行。
- ④ 可以嵌套使用,多个hoc是可以嵌套使用的,而且一般不会限制包装HOC的先后顺序。
缺点:
-
① 一般无法直接获取业务组件的状态,如果想要获取,需要ref获取组件实例。
-
② 无法直接继承静态属性。如果需要继承需要手动处理,或者引入第三方库。
class Index extends React.Component{
  render(){
    return <div> hello,world  </div>
  }
}
Index.say = function(){
  console.log('my name is alien')
}
function HOC(Component) {
  return class wrapComponent extends React.Component{
     render(){
       return <Component { ...this.props } { ...this.state } />
     }
  }
}
const newIndex =  HOC(Index)
console.log(newIndex.say)
5.2 反向的继承
反向继承和属性代理有一定的区别,在于包装后的组件继承了业务组件本身,所以我们我无须在去实例化我们的业务组件。当前高阶组件就是继承后,加强型的业务组件。
class Index extends React.Component{
render(){
  return <div> hello,world  </div>
}
}
function HOC(Component){
  return class wrapComponent extends Component{ /* 直接继承需要包装的组件 */

  }
}
export default HOC(Index)
优点:
- ① 方便获取组件内部状态,比如state,props ,生命周期,绑定的事件函数等
- ② es6继承可以良好继承静态属性。我们无须对静态属性和方法进行额外的处理。
class Index extends React.Component{
  render(){
    return <div> hello,world  </div>
  }
}
Index.say = function(){
  console.log('my name is alien')
}
function HOC(Component) {
  return class wrapComponent extends Component{
  }
}
const newIndex =  HOC(Index)
console.log(newIndex.say)
缺点:
- ① 无状态组件无法使用。
- ② 和被包装的组件强耦合,需要知道被包装的组件的内部状态,具体是做什么?
- ③ 如果多个反向继承hoc嵌套在一起,当前状态会覆盖上一个状态。这样带来的隐患是非常大的,比如说有多个componentDidMount,当前componentDidMount会覆盖上一个componentDidMount。这样副作用串联起来,影响很大。
6.如何编写高阶组件
- 强化props: 混入props和抽离state控制更新。
- 控制渲染: 条件渲染和节流渲染。
- 赋值组件: 劫持原型链, 劫持生命周期,事件函数, 事件监控, ref助力操控组件。
6.1 强化props
6.1.1. 混入props
这个是高阶组件最常用的功能,承接上层的props,在混入自己的props,来强化组件。
有状态组件:
function classHOC(WrapComponent){
    return class  Idex extends React.Component{
        state={
            name:'alien'
        }
        componentDidMount(){
           console.log('HOC')
        }
        render(){
            return <WrapComponent { ...this.props }  { ...this.state }   />
        }
    }
}
function Index(props){
  const { name } = props
  useEffect(()=>{
     console.log( 'index' )
  },[])
  return <div>
    hello,world , my name is { name }
  </div>
}

export default classHOC(Index)
无状态组件:
function functionHoc(WrapComponent){
    return function Index(props){
        const [ state , setState ] = useState({ name :'alien'  })
        return  <WrapComponent { ...props }  { ...state }   />
    }
}
6.1.2 抽离state控制更新
高阶组件可以将HOC的state的配合起来,控制业务组件的更新。这种用法在react-redux中connect高阶组件中用到过,用于处理来自redux中state更改,带来的订阅更新作用。
function classHOC(WrapComponent){
  return class  Idex extends React.Component{
      constructor(){
        super()
        this.state={
          name:'alien'
        }
      }
      changeName(name){
        this.setState({ name })
      }
      render(){
          return <WrapComponent { ...this.props }  { ...this.state } changeName={this.changeName.bind(this)  }  />
      }
  }
}
function Index(props){
  const [ value ,setValue ] = useState(null)
  const { name ,changeName } = props
  return <div>
    <div>   hello,world , my name is { name }</div>
    改变name <input onChange={ (e)=> setValue(e.target.value)  }  />
    <button onClick={ ()=>  changeName(value) }  >确定</button>
  </div>
}

export default classHOC(Index)
6.2 控制渲染
- 条件渲染
- 节流渲染
6.2.1 条件渲染
- 动态渲染。
- 分片渲染。
- 异步组件(懒加载)。
- 反向继承: 渲染劫持。
- 反向继承: 修改渲染树。
6.2.1.1 动态渲染
对于属性代理的高阶组件,虽然不能在内部操控渲染状态,但是可以在外层控制当前组件是否渲染,这种情况应用于,权限隔离,懒加载 ,延时加载等场景。
实现一个动态挂载组件的HOC
function renderHOC(WrapComponent){
  return class Index  extends React.Component{
      constructor(props){
        super(props)
        this.state={ visible:true }
      }
      setVisible(){
         this.setState({ visible:!this.state.visible })
      }
      render(){
         const {  visible } = this.state
         return <div className="box"  >
           <button onClick={ this.setVisible.bind(this) } > 挂载组件 </button>
           { visible ? <WrapComponent { ...this.props } setVisible={ this.setVisible.bind(this) }   />  : <div className="icon" ><SyncOutlined spin  className="theicon"  /></div> }
         </div>
      }
  }
}

class Index extends React.Component{
  render(){
    const { setVisible } = this.props
    return <div className="box" >
        <p>hello,my name is alien</p>
        <img  src='https://ss2.bdstatic.com/70cFvnSh_Q1YnxGkpoWK1HF6hhy/it/u=294206908,2427609994&fm=26&gp=0.jpg'   />
        <button onClick={() => setVisible()}  > 卸载当前组件 </button>
    </div>
  }
}
export default renderHOC(Index)
6.2.1.2 分片渲染
实现一个懒加载功能的HOC,可以实现组件的分片渲染,用于分片渲染页面,不至于一次渲染大量组件造成白屏效果。
const renderQueue = []
let isFirstrender = false
const tryRender = ()=>{
const render = renderQueue.shift()
if(!render) return
setTimeout(()=>{
render() /* 执行下一段渲染 */
},300)
}
/* HOC */
function renderHOC(WrapComponent){
return function Index(props){
const [ isRender , setRender ] = useState(false)
useEffect(()=>{
renderQueue.push(()=>{ /* 放入待渲染队列中 */
setRender(true)
})
if(!isFirstrender) {
tryRender() /**/
isFirstrender = true
}
},[])
return isRender ? <WrapComponent tryRender={tryRender} { ...props } /> : <div className='box' ><div className="icon" ><SyncOutlined spin /></div></div>
}
}
/* 业务组件 */
class Index extends React.Component{
componentDidMount(){
const { name , tryRender} = this.props
/* 上一部分渲染完毕,进行下一部分渲染 */
tryRender()
console.log( name+'渲染')
}
render(){
return <div>
<img src="https://ss2.bdstatic.com/70cFvnSh_Q1YnxGkpoWK1HF6hhy/it/u=294206908,2427609994&fm=26&gp=0.jpg" />
</div>
}
}
/* 高阶组件包裹 */
const Item = renderHOC(Index)
export default () => {
return <React.Fragment>
<Item name="组件一" />
<Item name="组件二" />
<Item name="组件三" />
</React.Fragment>
}
初始化的时候,HOC中将渲染真正组件的渲染函数,放入renderQueue队列中,然后初始化渲染一次,接下来,每一个项目组件,完成 didMounted 状态后,会从队列中取出下一个渲染函数,渲染下一个组件, 一直到所有的渲染任务全部执行完毕,渲染队列清空,有效的进行分片的渲染。
用HOC实现了条件渲染-分片渲染的功能,实际条件渲染理解起来很容易,就是通过变量,控制是否挂载组件,从而满足项目本身需求,条件渲染可以演变成很多模式。
6.2.1.3 异步组件
dva里面的dynamic就是应用HOC模式实现的组件异步加载。
/* 路由懒加载HOC */
export default function AsyncRouter(loadRouter) {
  return class Content extends React.Component {
    state = {Component: null}
    componentDidMount() {
      if (this.state.Component) return
      loadRouter()
        .then(module => module.default)
        .then(Component => this.setState({Component},
         ))
    }
    render() {
      const {Component} = this.state
      return Component ? <Component {
      ...this.props
      }
      /> : null
    }
  }
}

const Index = AsyncRouter(()=>import('../pages/index'))
hoc还可以配合其他API,做一下衍生的功能。如上配合import实现异步加载功能。
6.2.1.4 渲染劫持
HOC反向继承模式,可以实现颗粒化的渲染劫持,也就是可以控制基类组件的render函数,还可以篡改props,或者是children。
const HOC = (WrapComponent) =>
  class Index  extends WrapComponent {
    render() {
      if (this.props.visible) {
        return super.render()
      } else {
        return <div>暂无数据</div>
      }
    }
  }
6.2.1.5 修改渲染树
修改渲染状态(劫持render替换子节点)
class Index extends React.Component{
  render(){
    return <div>
       <ul>
         <li>react</li>
         <li>vue</li>
         <li>Angular</li>
       </ul>
    </div>
  }
}

function HOC (Component){
  return class Advance extends Component {
    render() {
      const element = super.render()
      const otherProps = {
        name:'alien'
      }
      /* 替换 Angular 元素节点 */
      const appendElement = React.createElement('li' ,{} , `hello ,world , my name  is ${ otherProps.name }` )
      const newchild =  React.Children.map(element.props.children.props.children,(child,index)=>{
           if(index === 2) return appendElement
           return  child
      })
      return  React.cloneElement(element, element.props, newchild)
    }
  }
}
export  default HOC(Index)
用劫持渲染的方式,来操纵super.render()后的React.element元素,然后配合 createElement , cloneElement , React.Children 等 api,可以灵活操纵,真正的渲染react.element。
6.2.2 节流渲染
hoc除了可以进行条件渲染,渲染劫持功能外,还可以进行节流渲染,也就是可以优化性能。
- 节流原理。
- 定制化渲染流。
6.2.2.1 节流原理
hoc可以配合hooks的useMemo等API配合使用,可以实现对业务组件的渲染控制,减少渲染次数,从而达到优化性能的效果。如下案例,我们期望当且仅当num改变的时候,渲染组件,但是不影响接收的props。
function HOC (Component){
     return function renderWrapComponent(props){
       const { num } = props
       const RenderElement = useMemo(() =>  <Component {...props}  /> ,[ num ])
       return RenderElement
     }
}
class Index extends React.Component{
  render(){
     console.log(`当前组件是否渲染`,this.props)
     return <div>hello,world, my name is alien </div>
  }
}
const IndexHoc = HOC(Index)

export default ()=> {
    const [ num ,setNumber ] = useState(0)
    const [ num1 ,setNumber1 ] = useState(0)
    const [ num2 ,setNumber2 ] = useState(0)
    return <div>
        <IndexHoc  num={ num } num1={num1} num2={ num2 }  />
        <button onClick={() => setNumber(num + 1) } >num++</button>
        <button onClick={() => setNumber1(num1 + 1) } >num1++</button>
        <button onClick={() => setNumber2(num2 + 1) } >num2++</button>
    </div>
}
我们只有点击 num++时候,才重新渲染子组件,点击其他按钮,只是负责传递了props,达到了期望的效果。
6.2.2.2 定制化渲染流
我们需要对上述hoc进行改造升级,是组件可以根据定制化方向,去渲染组件。也就是Hoc生成的时候,已经按照某种契约去执行渲染。
function HOC (rule){
     return function (Component){
        return function renderWrapComponent(props){
          const dep = rule(props)
          const RenderElement = useMemo(() =>  <Component {...props}  /> ,[ dep ])
          return RenderElement
        }
     }
}
/* 只有 props 中 num 变化 ,渲染组件  */
@HOC( (props)=> props['num'])
class IndexHoc extends React.Component{
  render(){
     console.log(`组件一渲染`,this.props)
     return <div> 组件一 : hello,world </div>
  }
}

/* 只有 props 中 num1 变化 ,渲染组件  */
@HOC((props)=> props['num1'])
class IndexHoc1 extends React.Component{
  render(){
     console.log(`组件二渲染`,this.props)
     return <div> 组件二 : my name is alien </div>
  }
}
export default ()=> {
    const [ num ,setNumber ] = useState(0)
    const [ num1 ,setNumber1 ] = useState(0)
    const [ num2 ,setNumber2 ] = useState(0)
    return <div>
        <IndexHoc  num={ num } num1={num1} num2={ num2 }  />
        <IndexHoc1  num={ num } num1={num1} num2={ num2 }  />
        <button onClick={() => setNumber(num + 1) } >num++</button>
        <button onClick={() => setNumber1(num1 + 1) } >num1++</button>
        <button onClick={() => setNumber2(num2 + 1) } >num2++</button>
    </div>
}
可以灵活控制React组件层面上的,props数据流和更新流。
6.3 赋能组件
外生命周期,劫持事件,监控日志等等。
- 劫持原型链, 劫持生命周期,事件函数。
- 事件监控。
- ref助力操控组件实例。
6.3.1 劫持原型链
劫持原型链, 劫持生命周期,事件函数。
6.3.1.1 属性代理实现
function HOC (Component){
  const proDidMount = Component.prototype.componentDidMount
  Component.prototype.componentDidMount = function(){
     console.log('劫持生命周期:componentDidMount')
     proDidMount.call(this)
  }
  return class wrapComponent extends React.Component{
      render(){
        return <Component {...this.props}  />
      }
  }
}
@HOC
class Index extends React.Component{
   componentDidMount(){
     console.log('———didMounted———')
   }
   render(){
     return <div>hello,world</div>
   }
}
6.3.1.2 反向继承实现
因为在继承原有组件的基础上,可以对原有组件的生命周期或事件进行劫持,甚至是替换。
function HOC (Component){
  const didMount = Component.prototype.componentDidMount
  return class wrapComponent extends Component{
      componentDidMount(){
        console.log('------劫持生命周期------')
        if (didMount) {
           didMount.apply(this) /* 注意 `this` 指向问题。 */
        }
      }
      render(){
        return super.render()
      }
  }
}

@HOC
class Index extends React.Component{
   componentDidMount(){
     console.log('———didMounted———')
   }
   render(){
     return <div>hello,world</div>
   }
}
6.3.2 事件监控
HOC还可以对原有组件进行监控。比如对一些事件监控,错误监控,事件监听等一系列操作。
6.3.2.1 组件内的事件监听
function ClickHoc (Component){
  return  function Wrap(props){
    const dom = useRef(null)
    useEffect(()=>{
     const handerClick = () => console.log('发生点击事件')
     dom.current.addEventListener('click',handerClick)
     return () => dom.current.removeEventListener('click',handerClick)
    },[])
    return  <div ref={dom}  ><Component  {...props} /></div>
  }
}

@ClickHoc
class Index extends React.Component{
   render(){
     return <div  className='index'  >
       <p>hello,world</p>
       <button>组件内部点击</button>
    </div>
   }
}
export default ()=>{
  return <div className='box'  >
     <Index />
     <button>组件外部点击</button>
  </div>
}
6.3.3 ref助力操控组件实例
对于属性代理我们虽然不能直接获取组件内的状态,但是我们可以通过ref获取组件实例,获取到组件实例,就可以获取组件的一些状态,或是手动触发一些事件,进一步强化组件,但是注意的是:class声明的有状态组件才有实例,function声明的无状态组件不存在实例。
6.3.3.1 属性代理-添加额外生命周期
针对某一种情况, 给组件增加额外的生命周期,我做了一个简单的demo,监听number改变,如果number改变,就自动触发组件的监听函数handerNumberChange。
function Hoc(Component){
  return class WrapComponent extends React.Component{
      constructor(){
        super()
        this.node = null
      }
      UNSAFE_componentWillReceiveProps(nextprops){
          if(nextprops.number !== this.props.number ){
            this.node.handerNumberChange  &&  this.node.handerNumberChange.call(this.node)
          }
      }
      render(){
        return <Component {...this.props} ref={(node) => this.node = node }  />
      }
  }
}
@Hoc
class Index extends React.Component{
  handerNumberChange(){
      /* 监听 number 改变 */
  }
  render(){
    return <div>hello,world</div>
  }
}
6.4 总结
对于属性代理HOC:
- 强化props & 抽离state。
- 条件渲染,控制渲染,分片渲染,懒加载。
- 劫持事件和生命周期
- ref控制组件实例
- 添加事件监听器,日志
对于反向代理的HOC:
- 劫持渲染,操纵渲染树
- 控制/替换生命周期,直接获取组件状态,绑定事件。
7.高阶组件源码级实践
- 强化prop- withRoute
- 控制渲染案例 connect
- 赋能组件-缓存生命周期 keepaliveLifeCycle
7.1 强化props
withRoute: 对于没有被Route包裹的组件,给添加history对象等和路由相关的状态,方便我们在任意组件中,都能够获取路由状态,进行路由跳转。强化props,把Router相关的状态都混入到props中。
function withRouter(Component) {
  const displayName = `withRouter(${Component.displayName || Component.name})`;
  const C = props => {
      /*  获取 */
    const { wrappedComponentRef, ...remainingProps } = props;
    return (
      <RouterContext.Consumer>
        {context => {
          return (
            <Component
              {...remainingProps}
              {...context}
              ref={wrappedComponentRef}
            />
          );
        }}
      </RouterContext.Consumer>
    );
  };

  C.displayName = displayName;
  C.WrappedComponent = Component;
  /* 继承静态属性 */
  return hoistStatics(C, Component);
}

export default withRouter
先从props分离出ref和props, 然后从存放整个route对象上下文RouterContext取出route对象,然后混入到原始组件的props中,最后用hoistStatics继承静态属性。
7.2 控制渲染
connect: connect的作用也有合并props, 但是更重要的是接受state, 来控制更新组件。
import store from './redux/store'
import { ReactReduxContext } from './Context'
import { useContext } from 'react'
function connect(mapStateToProps){
   /* 第一层: 接收订阅state函数 */
    return function wrapWithConnect (WrappedComponent){
        /* 第二层:接收原始组件 */
        function ConnectFunction(props){
            const [ , forceUpdate ] = useState(0)
            const { reactReduxForwardedRef ,...wrapperProps } = props

            /* 取出Context */
            const { store } = useContext(ReactReduxContext)

            /* 强化props:合并 store state 和 props  */
            const trueComponentProps = useMemo(()=>{
                  /* 只有props或者订阅的state变化,才返回合并后的props */
                 return selectorFactory(mapStateToProps(store.getState()),wrapperProps)
            },[ store , wrapperProps ])

            /* 只有 trueComponentProps 改变时候,更新组件。  */
            const renderedWrappedComponent = useMemo(
              () => (
                <WrappedComponent
                  {...trueComponentProps}
                  ref={reactReduxForwardedRef}
                />
              ),
              [reactReduxForwardedRef, WrappedComponent, trueComponentProps]
            )
            useEffect(()=>{
              /* 订阅更新 */
               const checkUpdate = () => forceUpdate(new Date().getTime())
               store.subscribe( checkUpdate )
            },[ store ])
            return renderedWrappedComponent
        }
        /* React.memo 包裹  */
        const Connect = React.memo(ConnectFunction)

        /* 处理hoc,获取ref问题 */
        if(forwardRef){
          const forwarded = React.forwardRef(function forwardConnectRef( props,ref) {
            return <Connect {...props} reactReduxForwardedRef={ref} reactReduxForwardedRef={ref} />
          })
          return hoistStatics(forwarded, WrappedComponent)
        }
        /* 继承静态属性 */
        return hoistStatics(Connect,WrappedComponent)
    }
}
export default Index
第一层接受订阅函数,第二层接收原始组件,然后用forwardRef处理ref,用hoistStatics 处理静态属性的继承,在包装组件内部,合并props,useMemo缓存原始组件,只有合并后的props发生变化,才更新组件,然后在useEffect内部通过store.subscribe()订阅更新。
7.3 赋能组件
缓存生命周期 keepaliveLifeCycle: actived 作为缓存路由组件激活时候用,初始化的时候会默认执行一次 , unActived 作为路由组件缓存完成后调用。但是生命周期需要用一个 HOC 组件keepaliveLifeCycle 包裹。
import React from 'react'
import { keepaliveLifeCycle } from 'react-keepalive-router'

@keepaliveLifeCycle
class index extends React.Component<any,any>{

    state={
        activedNumber:0,
        unActivedNumber:0
    }
    actived(){
        this.setState({
            activedNumber:this.state.activedNumber + 1
        })
    }
    unActived(){
        this.setState({
            unActivedNumber:this.state.unActivedNumber + 1
        })
    }
    render(){
        const { activedNumber , unActivedNumber } = this.state
        return <div  style={{ marginTop :'50px' }}  >
           <div> 页面 actived 次数: {activedNumber} </div>
           <div> 页面 unActived 次数:{unActivedNumber} </div>
        </div>
    }
}
export default index
import {lifeCycles} from '../core/keeper'
import hoistNonReactStatic from 'hoist-non-react-statics'
function keepaliveLifeCycle(Component) {
   class Hoc extends React.Component {
    cur = null
    handerLifeCycle = type => {
      if (!this.cur) return
      const lifeCycleFunc = this.cur[type]
      isFuntion(lifeCycleFunc) && lifeCycleFunc.call(this.cur)
    }
    componentDidMount() {
      const {cacheId} = this.props
      cacheId && (lifeCycles[cacheId] = this.handerLifeCycle)
    }
    componentWillUnmount() {
      const {cacheId} = this.props
      delete lifeCycles[cacheId]
    }
     render=() => <Component {...this.props} ref={cur => (this.cur = cur)}/>
  }
  return hoistNonReactStatic(Hoc,Component)
}
keepaliveLifeCycle: 通过ref或获取 class 组件的实例,在 hoc 初始化时候进行生命周期的绑定, 在 hoc 销毁阶段,对生命周期进行解绑, 然后交给keeper统一调度,keeper通过调用实例下面的生命周期函数,来实现缓存生命周期功能的。
8.高阶组件的注意事项
- 谨慎修改原型链
- 继承静态属性
- 跨层级捕获ref
- render中不要声明HOC
8.1 谨慎修改原型链
function HOC (Component){
  const proDidMount = Component.prototype.componentDidMount
  Component.prototype.componentDidMount = function(){
     console.log('劫持生命周期:componentDidMount')
     proDidMount.call(this)
  }
  return  Component
}
这样做会产生一些不良后果。比如如果你再用另一个同样会修改 componentDidMount 的 HOC 增强它,那么前面的 HOC 就会失效!同时,这个 HOC 也无法应用于没有生命周期的函数组件。
8.2 继承静态属性
8.2.1 手动继承
我们可以手动将原始组件的静态方法copy到 hoc组件上来,但前提是必须准确知道应该拷贝哪些方法。
function HOC(Component) {
  class WrappedComponent extends React.Component {
      /*...*/
  }
  // 必须准确知道应该拷贝哪些方法
  WrappedComponent.staticMethod = Component.staticMethod
  return WrappedComponent
}
8.2.2 引入第三方库
原生组件的静态方法是未知的,我们可以使用 hoist-non-react-statics 自动拷贝所有的静态方法。
import hoistNonReactStatic from 'hoist-non-react-statics'
function HOC(Component) {
  class WrappedComponent extends React.Component {
      /*...*/
  }
  hoistNonReactStatic(WrappedComponent,Component)
  return WrappedComponent
}
8.3 跨层级捕获ref
高阶组件的约定是将所有 props 传递给被包装组件,但这对于 refs 并不适用。那是因为 ref 实际上并不是一个 prop - 就像 key 一样,它是由 React 专门处理的。如果将 ref 添加到 HOC 的返回组件中,则 ref 引用指向容器组件,而不是被包装组件。我们可以通过forwardRef来解决这个问题。
function HOC(Component,isRef){
  class Wrap extends React.Component{
     render(){
        const { forwardedRef ,...otherprops  } = this.props
        return <Component ref={forwardedRef}  {...otherprops}  />
     }
  }
    if(isRef){
      return  React.forwardRef((props,ref)=> <Wrap forwardedRef={ref} {...props} /> )
    }
    return Wrap
}

class Index extends React.Component{
  componentDidMount(){
      console.log(666)
  }
  render(){
    return <div>hello,world</div>
  }
}

const HocIndex =  HOC(Index,true)

export default ()=>{
  const node = useRef(null)
  useEffect(()=>{
     /* 就可以跨层级,捕获到 Index 组件的实例了 */
    console.log(node.current.componentDidMount)
  },[])
  return <div><HocIndex ref={node}  /></div>
}
8.4 render中不要声明HOC
class Index extends React.Component{
  render(){
     const WrapHome = HOC(Home)
     return <WrapHome />
  }
}
因为每一次HOC都会返回一个新的WrapHome,react diff会判定两次不是同一个组件,那么每次Index 组件 render触发,WrapHome,会重新挂载,状态会全都丢失。
const WrapHome = HOC(Home)
class index extends React.Component{
  render(){
     return <WrapHome />
  }
}